> ## Documentation Index
> Fetch the complete documentation index at: https://bloodhound.specterops.io/llms.txt
> Use this file to discover all available pages before exploring further.
# Install or upgrade SharpHound Enterprise
> Install SharpHound Enterprise on a Windows server or upgrade an existing deployment.
 Use this guide to install SharpHound Enterprise on a domain-joined Windows server, upgrade an existing installation, or perform a headless installation for automated deployment workflows.
## Before you begin
* Deploy a domain-joined Windows server for the service. For requirements and deployment guidance, see [SharpHound Enterprise System Requirements and Deployment Process](/install-data-collector/install-sharphound/system-requirements).
* Sign in with a user role that is authorized to download SharpHound Enterprise installation binaries. For role details, see [User Role Definitions](/manage-bloodhound/auth/users-and-roles#user-role-definitions).
## Install SharpHound Enterprise
Sign in to your BloodHound Enterprise tenant.
In the left menu, click **Download Collectors**.
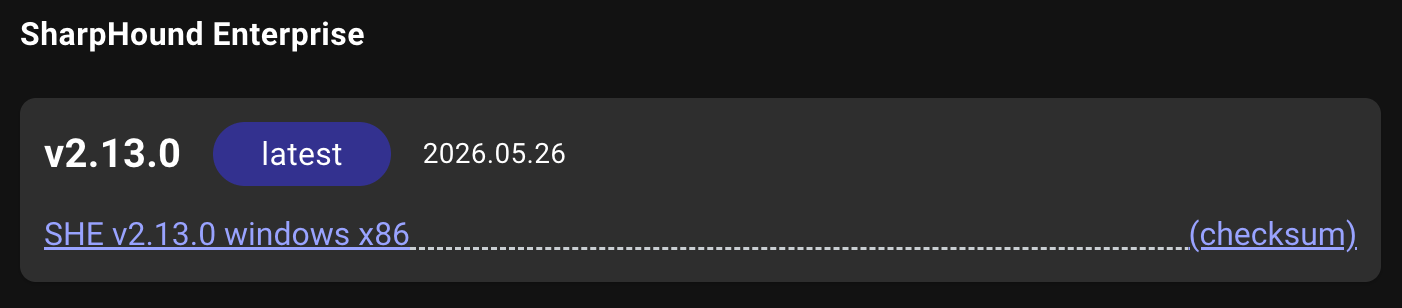
Click the latest SharpHound Enterprise version to begin downloading the `.zip` archive.
Use this guide to install SharpHound Enterprise on a domain-joined Windows server, upgrade an existing installation, or perform a headless installation for automated deployment workflows.
## Before you begin
* Deploy a domain-joined Windows server for the service. For requirements and deployment guidance, see [SharpHound Enterprise System Requirements and Deployment Process](/install-data-collector/install-sharphound/system-requirements).
* Sign in with a user role that is authorized to download SharpHound Enterprise installation binaries. For role details, see [User Role Definitions](/manage-bloodhound/auth/users-and-roles#user-role-definitions).
## Install SharpHound Enterprise
Sign in to your BloodHound Enterprise tenant.
In the left menu, click **Download Collectors**.
Click the latest SharpHound Enterprise version to begin downloading the `.zip` archive.
 Connect to the server where you want to install the SharpHound Enterprise service.
Confirm that your SharpHound service account is a member of the local **Administrators** group.
Copy the downloaded `.zip` archive to the target server and extract it.
Choose one of the following installation methods:
Use this method for standard installations where you can interact with the installer UI.
1. Run **SHSetup-v#.#.#.exe** as an administrator.
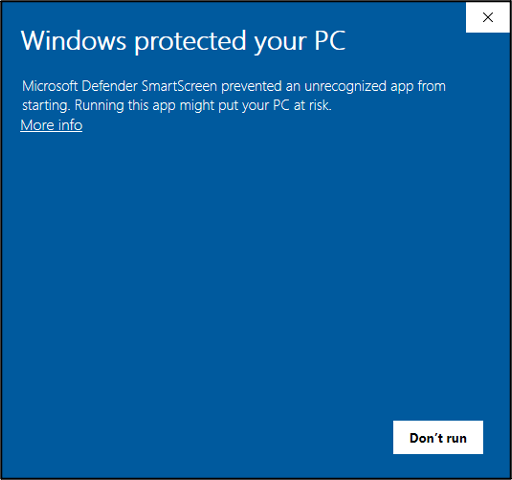
2. If Microsoft Defender SmartScreen displays the following warning, click **More info**.
Connect to the server where you want to install the SharpHound Enterprise service.
Confirm that your SharpHound service account is a member of the local **Administrators** group.
Copy the downloaded `.zip` archive to the target server and extract it.
Choose one of the following installation methods:
Use this method for standard installations where you can interact with the installer UI.
1. Run **SHSetup-v#.#.#.exe** as an administrator.
2. If Microsoft Defender SmartScreen displays the following warning, click **More info**.
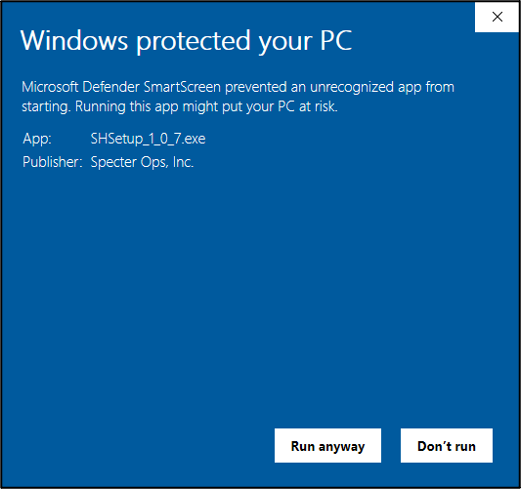
 Confirm that the publisher is **Specter Ops, Inc.**, then click **Run anyway**.
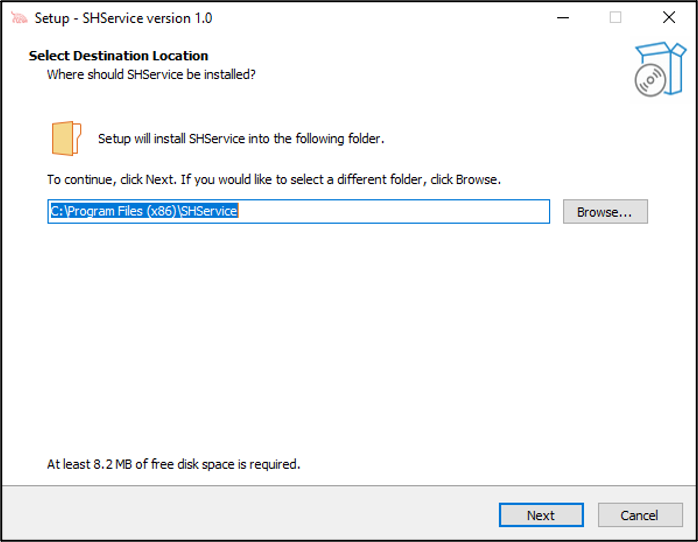
 3. Select the installation path, then click **Next**.
We recommend a path that low-privileged users cannot write to, such as the default `C:\Program Files (x86)\SHService`.
3. Select the installation path, then click **Next**.
We recommend a path that low-privileged users cannot write to, such as the default `C:\Program Files (x86)\SHService`.
 4. Click **Install**.
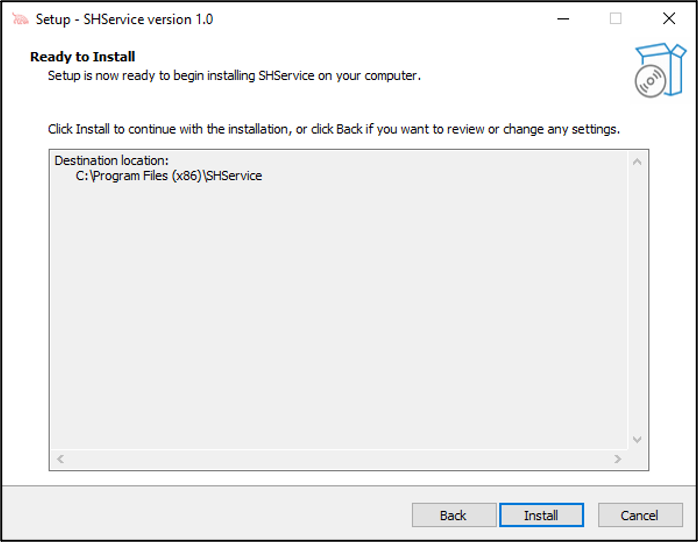 5. Enter the SharpHound service account credentials in the format `DOMAIN\username`.
If you use a gMSA, follow the guidance in [SharpHound hardening](/manage-bloodhound/securing-bloodhound-and-collectors/sharphound-hardening): enter credentials for a standard user account that has local administrator access during installation, then switch the service to the gMSA after installation as described in [Add the gMSA to the SharpHound Enterprise service](/install-data-collector/install-sharphound/create-gmsa).
5. Enter the SharpHound service account credentials in the format `DOMAIN\username`.
If you use a gMSA, follow the guidance in [SharpHound hardening](/manage-bloodhound/securing-bloodhound-and-collectors/sharphound-hardening): enter credentials for a standard user account that has local administrator access during installation, then switch the service to the gMSA after installation as described in [Add the gMSA to the SharpHound Enterprise service](/install-data-collector/install-sharphound/create-gmsa).
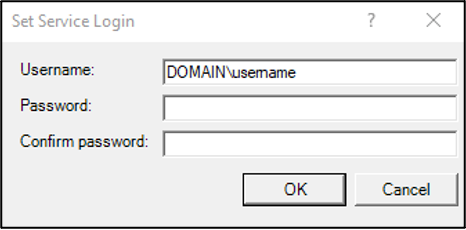 6. Click **Finish**.
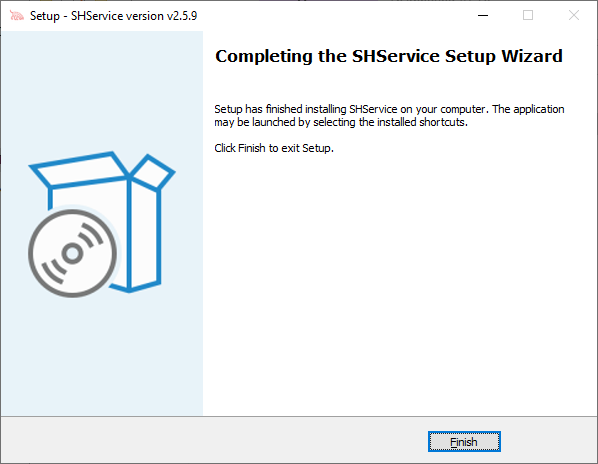 Use this method for automated deployments where interactive desktop sessions are unavailable or restricted.
We recommend using a [Group Managed Service Account (gMSA)](/install-data-collector/install-sharphound/create-gmsa) for the SharpHound Enterprise service account instead of a standard Active Directory user account.
Run the installer silently, then register the service. Replace the placeholder values to match your environment and SharpHound Enterprise version.
```powershell theme={null}
# Run the silent installer
SHSetup-.exe /VERYSILENT /SUPPRESSMSGBOXES /FORCECLOSEAPPLICATIONS /LOG="BloodHound.log"
# Register the service
$ServiceName = "SHDelegator"
$DisplayName = "SharpHoundDelegator"
$ExecutablePath = "C:\Program Files (x86)\SHService\SHDelegator.exe"
$Username = "DOMAIN\service-account" # For a gMSA, use the format DOMAIN\$ (include the trailing $)
$Password = "" # Leave blank ("") for a gMSA
if (-not (Get-Service -Name $ServiceName -ErrorAction SilentlyContinue)) {
New-Service -Name $ServiceName `
-BinaryPathName "`"$ExecutablePath`"" `
-DisplayName $DisplayName `
-StartupType Automatic
}
$svc = Get-WmiObject -Class Win32_Service -Filter "Name='$ServiceName'"
$null = $svc.Change(
$null, # StartMode
$null, # DesktopInteract
$null, # ErrorControl
$null, # BinaryPathName
$null, # LoadOrderGroup
$null, # LoadOrderGroupDependencies
$Username, # ServiceAccountName
$Password # Password
)
```
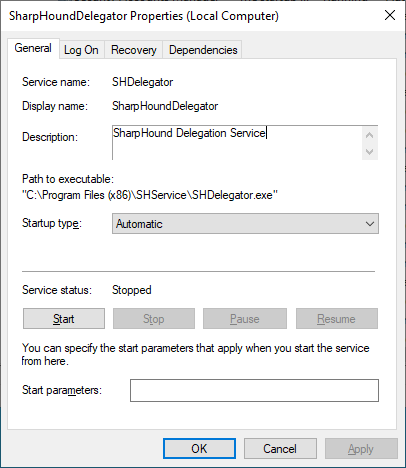
Confirm that the **SharpHoundDelegator** service is present.
**Interactive installation**
Use this method for automated deployments where interactive desktop sessions are unavailable or restricted.
We recommend using a [Group Managed Service Account (gMSA)](/install-data-collector/install-sharphound/create-gmsa) for the SharpHound Enterprise service account instead of a standard Active Directory user account.
Run the installer silently, then register the service. Replace the placeholder values to match your environment and SharpHound Enterprise version.
```powershell theme={null}
# Run the silent installer
SHSetup-.exe /VERYSILENT /SUPPRESSMSGBOXES /FORCECLOSEAPPLICATIONS /LOG="BloodHound.log"
# Register the service
$ServiceName = "SHDelegator"
$DisplayName = "SharpHoundDelegator"
$ExecutablePath = "C:\Program Files (x86)\SHService\SHDelegator.exe"
$Username = "DOMAIN\service-account" # For a gMSA, use the format DOMAIN\$ (include the trailing $)
$Password = "" # Leave blank ("") for a gMSA
if (-not (Get-Service -Name $ServiceName -ErrorAction SilentlyContinue)) {
New-Service -Name $ServiceName `
-BinaryPathName "`"$ExecutablePath`"" `
-DisplayName $DisplayName `
-StartupType Automatic
}
$svc = Get-WmiObject -Class Win32_Service -Filter "Name='$ServiceName'"
$null = $svc.Change(
$null, # StartMode
$null, # DesktopInteract
$null, # ErrorControl
$null, # BinaryPathName
$null, # LoadOrderGroup
$null, # LoadOrderGroupDependencies
$Username, # ServiceAccountName
$Password # Password
)
```
Confirm that the **SharpHoundDelegator** service is present.
**Interactive installation**
 **Headless installation**
```powershell theme={null}
Get-Service -Name "SHDelegator"
```
If you do not see the service, see [I don't see the SharpHoundDelegator service](/install-data-collector/install-sharphound/installation-upgrade#no-service).
If you use a gMSA, change the service to run as the gMSA as described in [Add the gMSA to the SharpHound Enterprise service](/install-data-collector/install-sharphound/create-gmsa).
Start the service once.
For headless installations, run the following command:
```powershell theme={null}
Start-Service -Name $ServiceName
```
This initial startup fails, but it creates the configuration and log directory in the service account's user profile: `%AppData%\BloodHoundEnterprise`.
Update `settings.json` and `auth.json` as described in [SharpHound Enterprise Local Configuration](/install-data-collector/install-sharphound/local-configuration).
In most environments, update the following values:
* In `settings.json`, set `RestEndpoint` to your BloodHound Enterprise tenant domain in the format `CODENAME.bloodhoundenterprise.io`.
* In `settings.json`, if you use a proxy, set `Proxy` in the format `proxy.acme.com:8080`.
* [Create a BloodHound Enterprise collector client](/collect-data/enterprise-collection/create-collector), then set `Token` and `TokenID` in `auth.json` to the generated values.
Start the service.
For headless installations, run the following command:
```powershell theme={null}
Start-Service -Name "SHDelegator"
```
If the service does not start, see [The SharpHoundDelegator service won't start](/install-data-collector/install-sharphound/installation-upgrade#no-start).
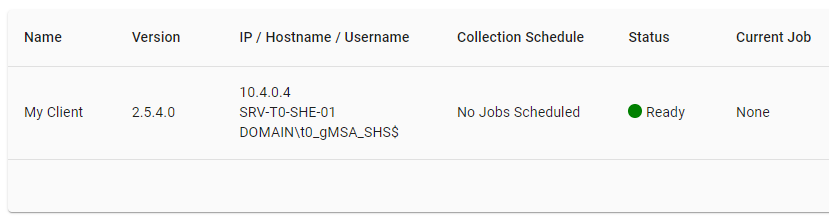
Return to BloodHound Enterprise and confirm that the client reports **🟢 Ready**.
**Headless installation**
```powershell theme={null}
Get-Service -Name "SHDelegator"
```
If you do not see the service, see [I don't see the SharpHoundDelegator service](/install-data-collector/install-sharphound/installation-upgrade#no-service).
If you use a gMSA, change the service to run as the gMSA as described in [Add the gMSA to the SharpHound Enterprise service](/install-data-collector/install-sharphound/create-gmsa).
Start the service once.
For headless installations, run the following command:
```powershell theme={null}
Start-Service -Name $ServiceName
```
This initial startup fails, but it creates the configuration and log directory in the service account's user profile: `%AppData%\BloodHoundEnterprise`.
Update `settings.json` and `auth.json` as described in [SharpHound Enterprise Local Configuration](/install-data-collector/install-sharphound/local-configuration).
In most environments, update the following values:
* In `settings.json`, set `RestEndpoint` to your BloodHound Enterprise tenant domain in the format `CODENAME.bloodhoundenterprise.io`.
* In `settings.json`, if you use a proxy, set `Proxy` in the format `proxy.acme.com:8080`.
* [Create a BloodHound Enterprise collector client](/collect-data/enterprise-collection/create-collector), then set `Token` and `TokenID` in `auth.json` to the generated values.
Start the service.
For headless installations, run the following command:
```powershell theme={null}
Start-Service -Name "SHDelegator"
```
If the service does not start, see [The SharpHoundDelegator service won't start](/install-data-collector/install-sharphound/installation-upgrade#no-start).
Return to BloodHound Enterprise and confirm that the client reports **🟢 Ready**.
 Start data collection by doing one of the following:
* [Create a data collection schedule](/collect-data/enterprise-collection/collection-schedule)
* [Run an on-demand scan](/collect-data/enterprise-collection/on-demand-scan)
## Upgrade SharpHound Enterprise
Sign in to your BloodHound Enterprise tenant.
In the left menu, click **Download Collectors**.
Click the latest SharpHound Enterprise version to begin downloading the `.zip` archive.
Connect to the SharpHound Enterprise server.
Extract the `.zip` archive, then run **SHSetup-v#.#.#.exe** as an administrator.
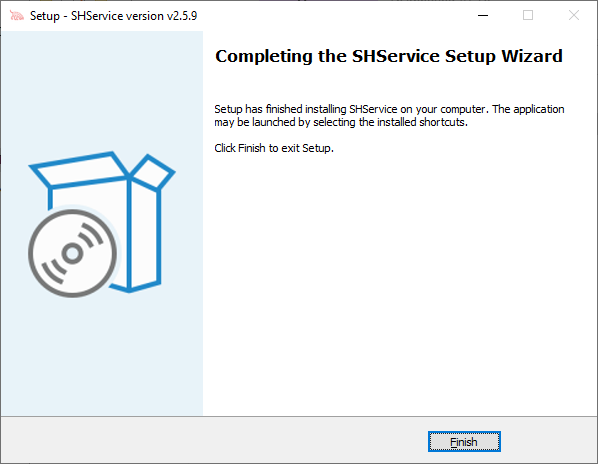
Click **Finish**.
Start data collection by doing one of the following:
* [Create a data collection schedule](/collect-data/enterprise-collection/collection-schedule)
* [Run an on-demand scan](/collect-data/enterprise-collection/on-demand-scan)
## Upgrade SharpHound Enterprise
Sign in to your BloodHound Enterprise tenant.
In the left menu, click **Download Collectors**.
Click the latest SharpHound Enterprise version to begin downloading the `.zip` archive.
Connect to the SharpHound Enterprise server.
Extract the `.zip` archive, then run **SHSetup-v#.#.#.exe** as an administrator.
Click **Finish**.
 Start the **SharpHoundDelegator** service.
If the service does not start, see [The SharpHoundDelegator service won't start](/install-data-collector/install-sharphound/installation-upgrade#no-start).
Confirm that the service starts successfully and resumes normal communication with BloodHound Enterprise.
## Common installation issues
Start the **SharpHoundDelegator** service.
If the service does not start, see [The SharpHoundDelegator service won't start](/install-data-collector/install-sharphound/installation-upgrade#no-start).
Confirm that the service starts successfully and resumes normal communication with BloodHound Enterprise.
## Common installation issues
I don't see the SharpHoundDelegator service
This issue most often has one of the following causes:
1. The service account was not added to the local **Administrators** group before installation.
2. The credentials entered during installation were incorrect.
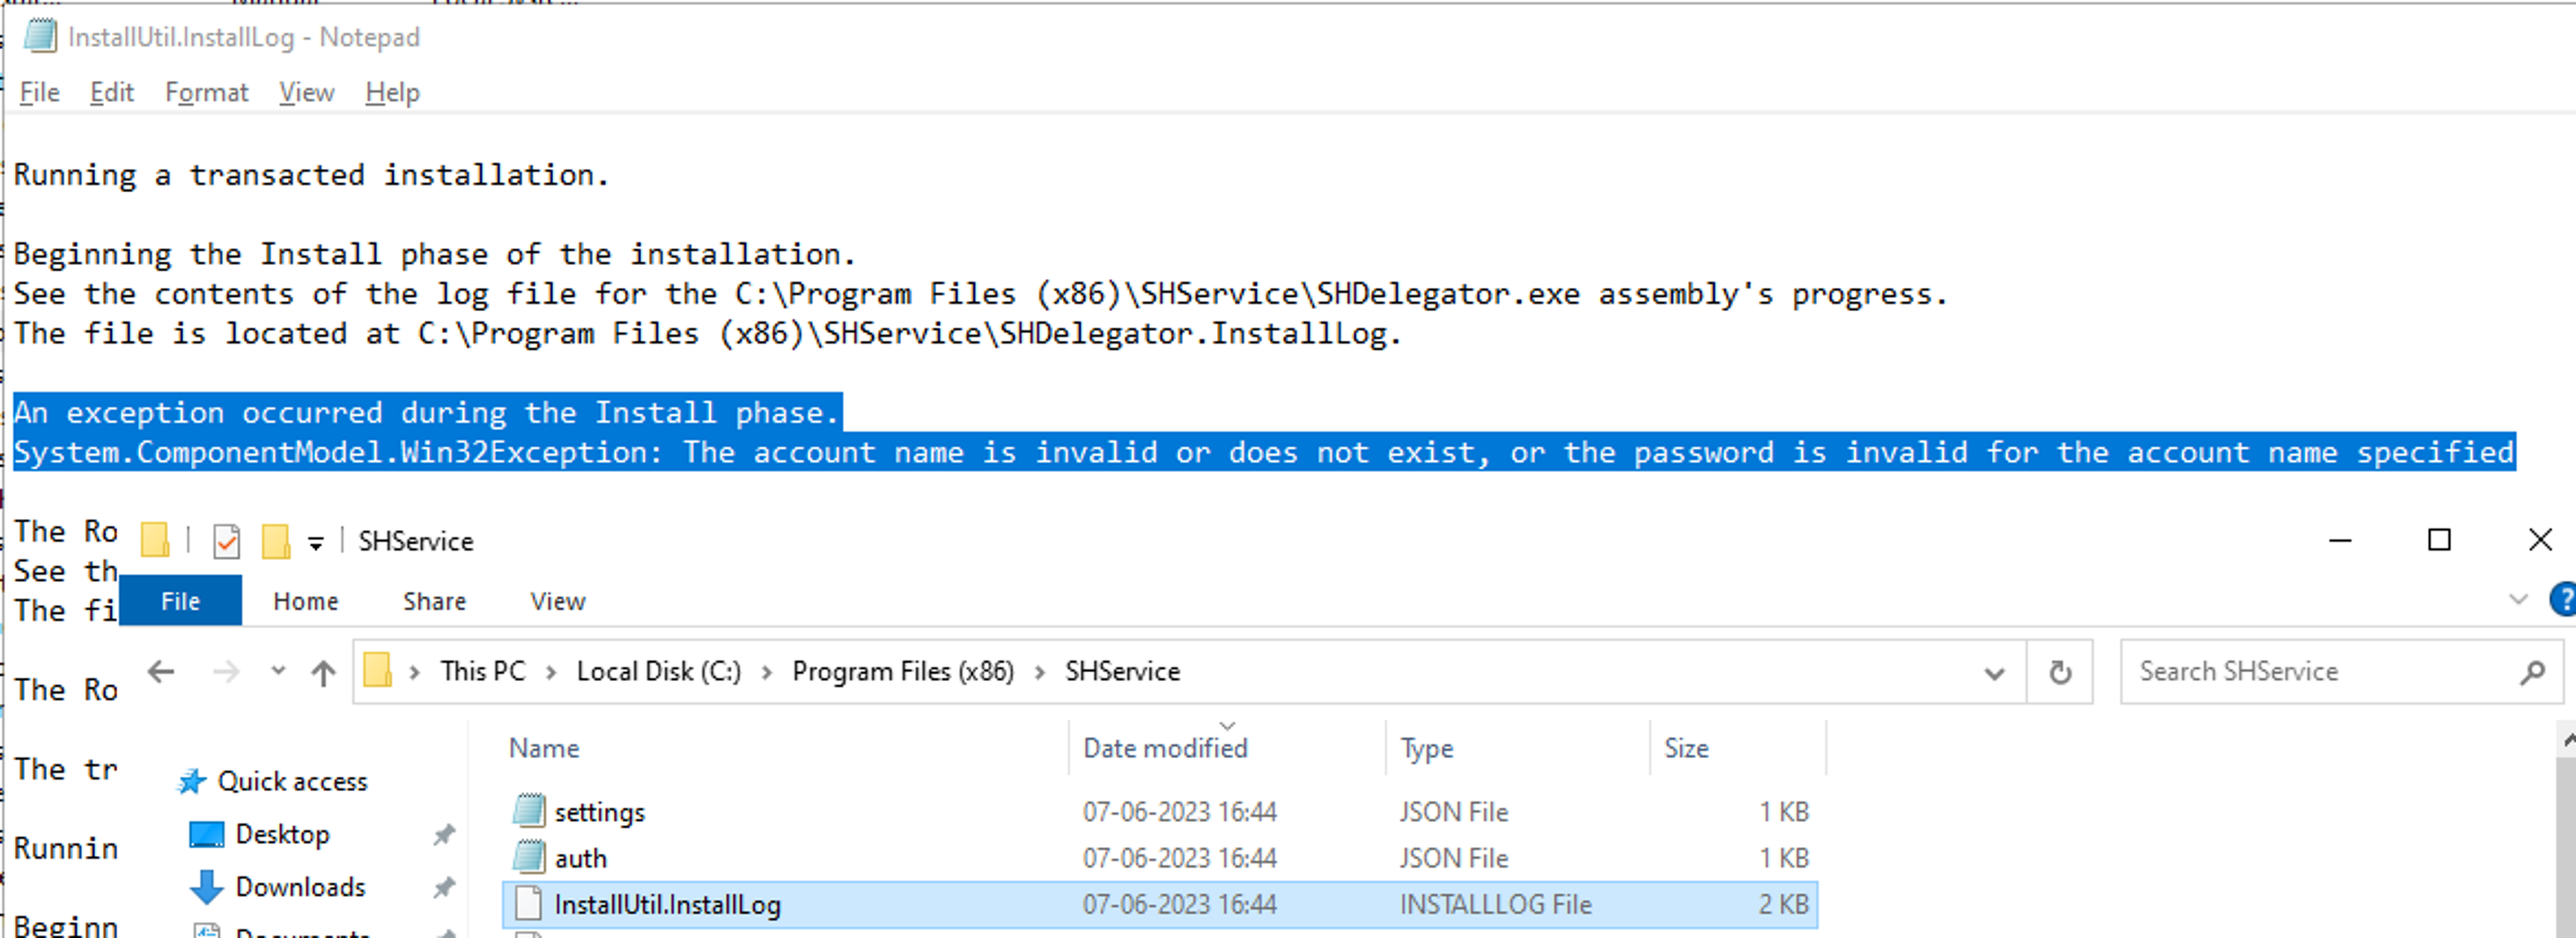
The installation log can help with troubleshooting. The file is `InstallUtil.Install.Log` in the installation directory. The default path is `C:\Program Files (x86)\SHService\InstallUtil.Install.Log`.
The SharpHoundDelegator service won't start
Check the `TempDirectory` value in `settings.json` as described in [SharpHound Enterprise Local Configuration](/install-data-collector/install-sharphound/local-configuration).
If `TempDirectory` is `null`, the service account does not have local administrator privileges. Add the service account to the local **Administrators** group, then restart the service.
If `TempDirectory` is set to a directory, open that directory, locate `service.log`, and review the logged errors. Common issues include:
* `RestEndpoint` cannot be resolved.
* Confirm that `RestEndpoint` matches your BloodHound Enterprise tenant domain in the format `CODENAME.bloodhoundenterprise.io`.
* Confirm that the host can resolve the domain from a command prompt.
* `RestEndpoint` cannot be reached, such as by timeout or connection refusal.
* Confirm that firewall exclusions for your BloodHound Enterprise tenant are configured correctly.
* If you need an explicit proxy, configure it in `settings.json`.
* Confirm TLS 1.2 connectivity to your BloodHound Enterprise tenant over port `443`.